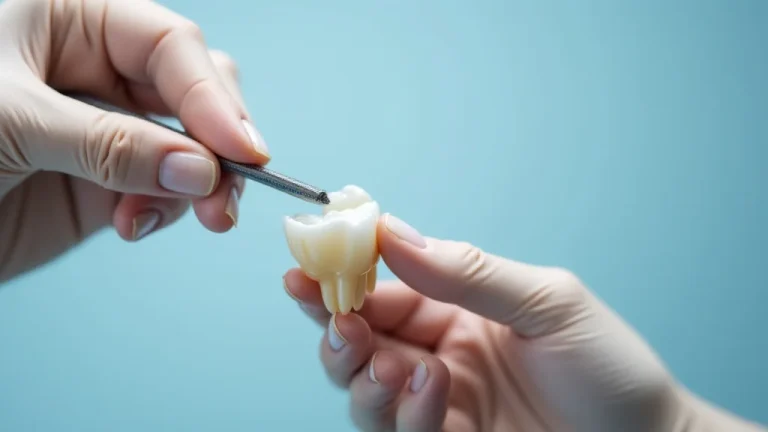
Remember that beautiful quilt your grandma made? That perfect finishing touch, that neat edge? Well, that’s quilt binding, and it’s easier to make than you might think! Maybe you’ve got a quilt top waiting, yearning for completion. This guide will walk you through, step by step, the process of how to make quilt binding. You’ll learn the techniques, the best fabrics, and the tips for a professional finish. By the end, you’ll be able to create stunning edges for your quilts and increase your sewing skills. Get ready to transform those quilt tops into treasured heirlooms!
Choosing the Right Fabric for Your Quilt Binding
Selecting the correct fabric is the first step in crafting beautiful binding that truly enhances your quilt. The type of fabric you choose will impact the look, feel, and durability of the finished product. Consider the overall aesthetic of your quilt when making this choice. Do you want the binding to blend seamlessly with the quilt or offer a contrasting pop of color or pattern? Think about how the quilt will be used. A quilt destined for heavy use, such as a bed quilt, requires a more durable fabric than a decorative wall hanging.
Fabric Types and Their Characteristics
There are several fabric options suitable for quilt binding. Each type has its own strengths and weaknesses. Cotton is the most popular choice due to its versatility, affordability, and ease of care. It comes in a wide variety of colors and patterns, making it ideal for coordinating with any quilt design. Consider the weight of the cotton; quilting cotton is the standard, but heavier cottons might be better for durability. Linen offers a unique texture and drape, giving your quilt a more sophisticated look. It can be more challenging to work with due to its tendency to fray, but the result is well worth the effort. Synthetic blends, like polyester-cotton, can be a good option for their wrinkle resistance and durability. However, they may not have the same softness or breathability as natural fibers.
- Cotton: The workhorse of quilting, offering versatility in color and pattern.
- Linen: Provides a textured, elegant finish, but frays easily.
- Polyester Blends: Durable and wrinkle-resistant, good for heavy use.
- Silk: Offers a luxurious, delicate binding, for special quilts.
- Flannel: Offers a soft, warm binding option, suitable for baby or comfort quilts.
When selecting your fabric, consider the weight and thread count, especially if you plan to machine bind. A high thread count will result in a more durable and lasting binding, better able to withstand the repeated washings that quilts often undergo. Remember that the binding will be folded and sewn multiple times, so a lighter-weight fabric is generally easier to work with. If you are using a patterned fabric, ensure that the pattern complements the overall design of your quilt. A busy binding can compete with the quilt’s main design. The color of your binding should either blend with the main colors in the quilt or provide a pleasing contrast.
Fabric Preparation and Cutting
Once you’ve selected your fabric, it’s time to prepare it for cutting. Always pre-wash and iron your fabric before cutting the binding strips. This process removes any sizing that may be in the fabric and will prevent the binding from shrinking after you have sewn it to your quilt. Use a rotary cutter, ruler, and self-healing mat for accurate cutting. Accurate cutting is key to a smooth, professional-looking binding. The width of your binding strips will depend on your desired finished width. A common width is 2.25 inches. However, you can adjust this based on your preferences. To determine how much fabric you need, measure the perimeter of your quilt and add extra for the corners and seams. A little extra fabric is always better than not enough.
- Pre-wash Fabric: Prevents shrinkage and removes sizing.
- Use Rotary Cutter: Precise cuts are crucial for binding accuracy.
- Cut on the Bias: For curves and flexibility.
- Seam Binding Strips: Join strips to create one long continuous binding.
- Iron and Press: Ensure flat seams for a neat finish.
Cutting the fabric on the bias (at a 45-degree angle to the selvage) is a preferred method, particularly for quilts with curved edges. Bias-cut strips have more stretch and flexibility, allowing them to conform to the curves and prevent puckering. However, straight-grain strips work just fine for quilts with straight edges. When joining the binding strips, sew them at a 45-degree angle to create a continuous piece. This method, often called a bias seam, minimizes bulk and distributes the seams evenly. Press all seams open, and then press the entire length of the binding strip in half, wrong sides together. This creates a neat, pre-folded edge, ready for attaching to your quilt.
Attaching the Binding to the Quilt
Once your binding strips are prepared, the next step is attaching them to the quilt’s edge. This step requires precision and careful attention to detail to achieve a neat, professional finish. You can attach the binding using either a machine or hand-sewing method, each having its advantages. Attaching your binding correctly will give your quilt a crisp, clean edge and protect the raw edges of your quilt fabric.
Machine Binding Technique
Machine binding is often preferred for its speed and durability. Start by pinning the unfolded binding strip to the front of your quilt, aligning the raw edges of the binding with the raw edges of the quilt. Begin sewing approximately 6-8 inches from the beginning of the binding strip, using a ¼-inch seam allowance. This leaves a tail for joining the binding at the end. As you sew, gently curve the binding around the corners of the quilt, creating a mitered corner. Once you reach the corner, stop sewing ¼ inch from the edge. Fold the binding up, creating a 45-degree angle, then fold it down again, aligning the edge of the binding with the next side of the quilt. This creates a neat mitered corner.
- Attach Binding: Align binding’s raw edges with quilt’s raw edges.
- Sew with ¼” Seam: Use accurate seam allowance for uniform edge.
- Miter Corners: Create neat corners, folding and re-folding.
- Join Binding Ends: Sew ends to form a continuous loop.
- Press Binding: Ensures binding lays flat, revealing the edge.
When you reach the starting point of your binding, stop sewing. Unfold the binding strip ends and trim them to create a straight line. Overlap the edges and sew them together at a 45-degree angle to create a continuous loop. Then, fold the binding back in place and continue sewing to secure the binding to the quilt. Once the binding is attached, press it away from the quilt on the front. This step will help the binding lie flat and make it easier to secure the binding to the back of the quilt. This will give your quilt a professional appearance.
Hand Binding Technique
Hand binding is a more time-consuming method, but it offers a more refined, detailed finish. This technique allows for greater control over the placement of the binding. Begin by folding the binding over the edge of the quilt to the back and pinning it in place. Using a needle and thread, hand-stitch the binding to the back of the quilt. Use a blind stitch, or a ladder stitch, for an invisible seam. This stitch catches only a tiny bit of the binding and the back of the quilt, creating a seam that is nearly invisible from the front. Work slowly and carefully, ensuring the binding is even and secure. A good hand-stitched binding can last for years.
- Fold and Pin: Fold binding over quilt edge and secure with pins.
- Use Blind Stitch: For invisible seam on the back of the quilt.
- Work Slowly: Ensure even stitches and secure binding.
- Tension is Key: Do not pull too tightly.
- Neat and Invisible: Aim for a clean, professional finish.
Mitered corners are created in the same manner as with machine binding. Once you have reached a corner, fold the binding in a similar manner, creating a 45-degree angle to form a mitered corner. This will give you a crisp, clean finish. This method is often preferred for quilts meant to be treasured heirlooms, as it provides a superior level of durability and a beautifully crafted finish. The slower pace of hand binding allows for precise placement and control, ensuring that every stitch is perfect. The key is patience and a steady hand. The end result is a work of art.
Advanced Techniques in How to Make Quilt Binding
After you have mastered the basic methods of how to make quilt binding, there are more advanced techniques to enhance your skills and elevate your quilts. These include creating decorative binding, curved binding, and adding embellishments. These techniques can turn a simple binding into a design element, adding personality and flair to your quilts. Explore these and take your quilting to the next level.
Creating Decorative Binding
Decorative binding allows you to add a unique touch to your quilts, reflecting your creativity and style. One option is to use a contrasting fabric for the binding to create a bold visual effect. Experiment with different colors and patterns to find the perfect look for your quilt. Another method is to incorporate embellishments such as piping or rickrack into the binding. Piping adds a defined edge and a touch of elegance. You can make your own piping or purchase pre-made piping to save time. Rickrack, with its distinctive zig-zag pattern, adds a playful and vintage feel to your quilt. Remember, these decorative elements can transform the overall aesthetic of your quilt.
- Contrast Fabrics: Use different colors for a striking effect.
- Incorporate Piping: Add a defined edge and visual interest.
- Add Rickrack: Introduce a playful vintage look.
- Experiment with Fabrics: Combine various textures and prints.
- Choose Color Wisely: Make sure your binding complements the quilt.
When incorporating embellishments, carefully pin the embellishment to the edge of the quilt and the binding strip before you start sewing. This ensures that the embellishment is properly aligned and secure. Use a matching thread color for a cohesive look or a contrasting thread color to highlight the decorative element. Another creative option is to use bias-cut binding in a different color or fabric than the quilt top, which creates a textured or patterned effect along the edges. This is also a great way to use up fabric scraps. Using multiple layers or textures in your binding also creates an interesting contrast and adds dimension. With a little creativity and practice, you can transform a simple quilt into a piece of art.
Curved Binding Techniques
Curved edges can add a soft and flowing element to your quilts, but require special techniques for binding. The key to successful curved binding is the use of bias-cut strips. The bias cut provides the flexibility needed to mold the binding to the curves without puckering or distorting the quilt’s edge. Begin by measuring the curved edge of your quilt and calculating the necessary length for your binding strips. Cut your binding strips on the bias to provide that extra stretch and flexibility.
- Use Bias-Cut Strips: For flexibility and a smooth finish.
- Slow and Steady: Pin carefully, a little at a time.
- Ease Binding: Don’t stretch the binding.
- Clip Corners: To release tension in the fabric.
- Hand Stitch: For a more accurate result.
When attaching the binding, work slowly and carefully, pinning the binding to the curved edge of the quilt. Ease the binding around the curves, gently stretching or easing it as needed. Avoid pulling or stretching the binding too tightly, as this will cause puckering. If the curve is sharp, you may need to clip into the seam allowance of the binding at regular intervals. This will help release the tension and allow the binding to lie flat. For a smoother finish, consider hand-stitching the binding to the back of the quilt. This allows for greater control and accuracy and will ensure that the binding conforms perfectly to the curved edge.
Maintaining and Caring for Your Quilt Binding
Proper maintenance will ensure that your quilt binding lasts for many years to come. Washing, storing, and repairing your quilts are key steps in preserving your hard work. By taking the time to care for your quilt, you’ll be able to enjoy it for years to come. Protect your investment by knowing the best ways to care for your quilt.
Washing and Cleaning
Follow the care instructions provided on your quilt. This will help you prevent damage and keep your quilt looking its best. Most quilts can be machine-washed on a gentle cycle. Use a mild detergent and wash your quilt in cold water. Avoid using harsh chemicals or bleach, which can damage the fabric and cause the colors to fade. Once washed, carefully remove the quilt from the washing machine and either tumble dry on low heat or lay it flat to dry. If you choose to machine dry, check the quilt frequently to prevent it from overheating. It’s often best to remove it while still slightly damp and lay it flat to finish air drying. This will prevent shrinkage and maintain the quilt’s shape.
- Follow Instructions: Adhere to care labels for best results.
- Use Mild Detergent: Avoid harsh chemicals and bleach.
- Gentle Cycle: Protect the fabric.
- Air Dry: Prevent shrinkage and maintain shape.
- Spot Clean: Address stains immediately.
For spot cleaning, use a mild soap and water solution and blot the stain gently with a clean cloth. Avoid rubbing the stain, which can spread it and damage the fabric. In case of larger stains, consider taking your quilt to a professional cleaner specializing in antique textiles. Proper cleaning and washing is vital to maintaining your quilt and preserving its beauty. By washing your quilt properly, you protect it from dirt, dust, and stains, preserving it for future generations.
Storage and Repair
Proper storage protects your quilt from damage and keeps it in good condition. Store your quilt in a cool, dry place away from direct sunlight. Direct sunlight can cause the colors to fade, and humidity can lead to mold and mildew. Consider storing the quilt in a breathable container, such as a cotton bag or pillowcase. Avoid storing your quilt in plastic containers, as this can trap moisture. Regularly check your quilt for any signs of wear and tear, and address any damage immediately. If you discover a tear or loose binding, repair it as soon as possible to prevent further damage. Small tears can be mended by hand. You can reinforce the binding with additional stitches. By providing safe storage, you ensure that your quilt will continue to bring comfort and joy for many years to come.
- Store in Cool, Dry Place: Protect from sunlight and moisture.
- Use Breathable Container: Avoid plastic bags.
- Check Regularly: Inspect for wear and tear.
- Repair Damage Immediately: Prevent further issues.
- Fold Properly: Prevents stress on seams.
When folding your quilt, avoid sharp creases that can weaken the fabric. If you’re storing it for an extended period, consider refolding it every few months to prevent stress on the seams. If you are not comfortable making repairs on your own, consider taking your quilt to a professional quilter for repairs. Properly storing your quilt is an essential part of its care. It protects your quilt from the elements, as well as preserving its value. If you regularly check the condition of your quilt, you can maintain its beauty for many years to come.
Frequently Asked Questions
Question: What is the best fabric for quilt binding?
Answer: Cotton is a popular and versatile choice, offering a wide range of colors and patterns, while other options such as linen and synthetic blends, offer unique aesthetics and durability.
Question: How wide should my binding strips be?
Answer: Binding strips are commonly cut at 2.25 inches wide, but this can be adjusted based on the finished width you desire.
Question: Can I use machine binding?
Answer: Machine binding is a quick and effective method, especially for those seeking durability, while hand binding gives more finesse.
Question: How do I create mitered corners?
Answer: After sewing the binding, fold it up at a 45-degree angle, then fold it down, aligning the binding’s edge with the next side of the quilt.
Question: What’s the best way to care for my quilt binding?
Answer: Wash gently, use mild detergent, and air dry or tumble dry on low heat. Store in a cool, dry place. Repair any damage as soon as possible.
Final Thoughts
Congratulations, you now know how to make quilt binding! You’ve explored different fabric choices, mastered the techniques of attaching binding to your quilt, and learned about advanced methods like decorative or curved binding, and what to do to maintain your beautiful piece. Whether you choose to machine bind or hand bind, remember that practice makes perfect. Don’t be afraid to experiment with different fabrics, colors, and embellishments to make each quilt uniquely yours. Your efforts in binding will truly transform your quilts and showcase your skills. Now, go forth and finish those quilts. Turn your hard work into something that will be cherished.