Picture this: You wake up on a chilly morning, ready for a warm shower, only to be greeted by icy water. Suddenly, the comfort of your home feels a little less cozy. This is when you realize the importance of a properly functioning hot water heater. While calling a professional is always an option, knowing how to install a hot water heater yourself can save you money and give you a sense of accomplishment. In this guide, we’ll walk you through the entire process, empowering you with the knowledge to tackle this common home improvement task. By the end, you’ll feel confident about tackling this project.
Gathering the Right Tools and Materials
Before you even think about starting the installation, you need to ensure you have everything you need. This preparation phase is very important for a smooth and safe process. The last thing you want is to be halfway through the project and realize you’re missing a critical piece. Careful planning here will prevent unnecessary trips to the hardware store and potential delays. Also, having the correct tools can make the job easier, quicker, and safer. It’s better to be prepared than to be caught short.
Essential Tools and Equipment
Several tools and pieces of equipment are essential for a successful hot water heater installation. These are the basics, and not having them can make the job difficult, even impossible. Here’s a list of must-haves:
- Adjustable Wrench: For connecting and disconnecting water lines. Choose one that opens wide enough to fit the large nuts on your water heater.
- Pipe Wrench: Useful for gripping and turning pipes securely. It’s particularly helpful when dealing with older, stubborn pipes.
- Screwdrivers (Phillips and Flathead): For any electrical connections or adjustments you might need to make.
- Voltage Tester: A crucial safety tool. Always use this to ensure the electrical circuit is off before working with any wiring.
- Level: To make sure the water heater is perfectly level, preventing any operational issues.
- Plumber’s Tape (Teflon Tape): For sealing threaded pipe connections to prevent leaks.
- Pipe Cutter or Hacksaw: To cut copper or other types of pipes to the correct length.
- Drain Pan: This catches any water leaks and protects your floor. If your local codes require it, it’s a must.
- Gloves: Protect your hands, particularly from sharp edges and debris.
- Safety Glasses: Protect your eyes from debris, particularly when cutting pipes.
It’s important to familiarize yourself with each tool and its proper use before starting the installation. Improper use can lead to damage, injury, or both.
Required Materials
Now, let’s explore the materials you’ll need. The specific materials can vary depending on the type of hot water heater you choose and local building codes, so always check those before you buy anything. Here’s a general list:
- New Hot Water Heater: Make sure you get the right size and type (electric, gas, or tankless) for your household’s needs and the space available.
- Water Supply Lines (Flexible or Rigid): For connecting the water supply to the heater. Ensure these are the correct type and size for your water heater.
- Gas Line Connector (if applicable): For gas water heaters. Be certain to comply with your local code requirements.
- Electrical Wire and Connectors (if applicable): For electric water heaters. Make sure the wire gauge is appropriate for the heater’s power requirements.
- Pressure Relief Valve: This valve releases pressure if it gets too high, protecting the tank.
- Drain Pipe and Fittings: For connecting to the drain valve, for flushing the tank.
- Dielectric Unions: These prevent corrosion between dissimilar metals.
- Other Fittings: Elbows, couplings, and nipples might be needed to connect pipes.
- Expansion Tank (if required): Check your local code to see if an expansion tank is required.
When selecting materials, prioritize quality and durability. Cheaper items can fail prematurely, leading to leaks and the need for early replacement. Consider using copper pipes for their durability or flexible stainless steel lines for easier installation. This saves you problems in the future.
Turning Off Utilities and Preparing the Old Heater
Safety is the most important factor in this whole procedure. Before you touch anything, you have to disconnect power and water sources. This prevents injuries and other kinds of damage. You’ll be working with both electricity and water, so this step is critical. Proceed carefully and methodically. This process might seem time-consuming, but doing it correctly is vital for your safety.
Shutting Off the Power and Water
This is where you make sure everything is turned off. Start by turning off the electrical supply to the hot water heater at the circuit breaker box. Label the breaker clearly so no one accidentally turns it back on while you’re working. Then, shut off the cold water supply to the heater. Usually, there’s a shut-off valve on the cold water line. If there isn’t one, you’ll need to shut off the water supply to your entire house. Before you continue, confirm that both the power and water are completely shut off.
Draining the Old Hot Water Heater
Draining the old heater is the next step. Connect a garden hose to the drain valve at the bottom of the heater. Run the other end of the hose to a floor drain or outside, where the water can safely drain. Open the drain valve and let the tank drain completely. To speed up the process, you can open the pressure relief valve at the top of the heater to let air in. After all the water is drained, disconnect the water lines and gas or electrical connections from the old heater.
- Safety Precautions: Always ensure the water is cool enough to handle before draining to avoid burns. If you’re unsure, let the water cool down for a few hours before beginning.
- Dealing with Sediment: Old heaters can have a lot of sediment in the bottom. This can clog the drain valve. If this happens, try using a screwdriver or wire to clear the blockage.
- Local Regulations: Check local regulations. Disposing of old hot water heaters might require certain steps or locations.
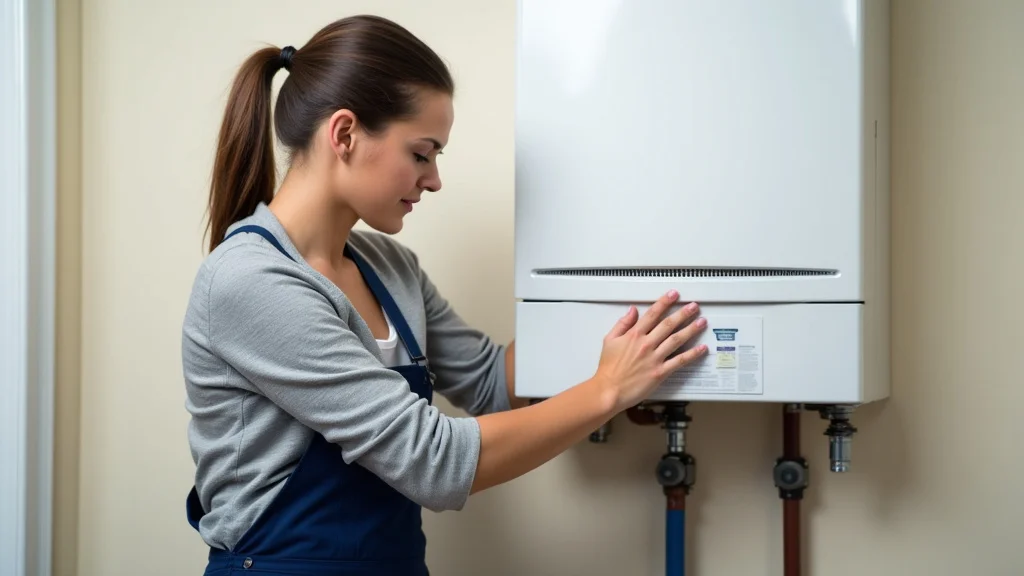
Removing and Installing the New Hot Water Heater
With the old heater removed and everything prepared, it’s time to bring in the new one. Make sure you have help, as these units can be heavy and difficult to maneuver. After positioning the new heater, start connecting everything. You’ll attach the water lines, gas connections (if applicable), and electrical wiring, making sure each connection is secure and leak-free. Double-check all connections to avoid future problems.
Setting the New Hot Water Heater in Place
Carefully move the new hot water heater into position. Make sure it’s level, using a level. An unlevel heater can cause problems. If you’re replacing the old unit, it is usually just a simple swap. However, if you are changing sizes or locations, make sure the new unit fits and there is enough room for it and the venting and access to the controls.
Connecting Water Lines
Now, connect the water lines. Using the adjustable wrench, attach the cold water inlet and hot water outlet to the appropriate pipes on the heater. Use plumber’s tape on the threaded connections to create a watertight seal. When tightening, don’t overtighten, as you could damage the fittings. If you are using flexible water lines, this step is often easier because they can bend to fit.
Connecting the Gas Line (If Applicable)
If you have a gas hot water heater, you will need to connect the gas line. This requires extra care because gas leaks can be very dangerous. Make sure the gas is shut off at the main valve before connecting the gas line to the heater. Use a pipe wrench to make secure connections. Once everything is connected, use a soapy water solution (dish soap and water) to check for gas leaks. Apply the solution to all connections and look for bubbles, which would indicate a leak. If you find a leak, tighten the connection until it stops.
Connecting the Electrical Wiring (If Applicable)
For electric hot water heaters, connect the electrical wiring. Remember to turn off the power at the circuit breaker box. Check the heater’s manual for specific wiring instructions. The wiring size must match the heater’s requirements. Use wire connectors to make secure connections. Once everything is wired, replace the cover on the heater’s electrical box. Only turn the power back on after you’ve completed all other connections and have checked for leaks.
Installing the Pressure Relief Valve
The pressure relief valve is a critical safety component. It’s usually installed at the top of the heater. Install the new pressure relief valve in the fitting provided and point the discharge pipe downwards. This pipe directs water away if the valve activates. Make sure the valve is the correct type for your heater. Also, ensure the discharge pipe runs to a safe drain location.
Testing and Final Steps
With everything connected, it’s time to test your work. Turn on the water supply and check for leaks. Then, restore power to the heater (if electric) and light the pilot light (if gas). Let the heater fill with water and reach the set temperature, watching for any signs of trouble. This is the moment when you know if everything works.
Checking for Leaks
Once the water supply is turned on, carefully check all connections. Look for drips or wet spots around the water lines, gas connections, and the drain valve. If you find leaks, tighten the connections. If that doesn’t fix it, you might need to disassemble the connection, apply more plumber’s tape, and reassemble it. Don’t be afraid to take your time. Leaks left undetected can cause water damage and other serious problems.
Testing the Hot Water Heater Operation
After confirming there are no leaks, turn on the power to the electric heater at the breaker. For a gas heater, light the pilot light and turn on the gas. Set the thermostat to your desired temperature. Wait for the water to heat up. Check the water temperature at a faucet. Make sure the water gets hot, and that the heater cycles on and off properly. Listen for any unusual sounds, like banging or rumbling, which could indicate a problem.
Final Inspections and Clean Up
Before you wrap up, give everything one final check. Make sure all connections are secure, the heater is level, and the drain pan is in place if required. Remove all tools and materials from the work area. Clean up any spills. Now, you’ve installed a hot water heater! Take a moment to appreciate your work. And, of course, enjoy that first hot shower.
-
John’s old electric hot water heater started making loud noises. He found that sediment had built up in the bottom of the tank. Using the drain valve and a hose, he flushed the tank, removing the sediment and restoring the heater’s efficiency.
-
Sarah’s gas hot water heater wasn’t heating water properly. She discovered the pilot light wasn’t staying lit. She cleaned the pilot assembly, which restored the flame, allowing the heater to function correctly again.
The average lifespan of a hot water heater is between 8 to 12 years, according to the U.S. Department of Energy. Regular maintenance, such as flushing the tank, can extend its life and improve efficiency.
According to the Environmental Protection Agency, a leaky hot water heater can waste a significant amount of water. Checking for leaks regularly is essential to prevent water waste and potential water damage.
Frequently Asked Questions
Question: How often should I flush my hot water heater?
Answer: It’s best to flush your water heater at least once a year to remove sediment and improve its efficiency.
Question: What’s the ideal water temperature setting for a hot water heater?
Answer: Set the thermostat to 120 degrees Fahrenheit (49 degrees Celsius) to prevent scalding and save energy.
Question: What do I do if my water heater is leaking?
Answer: Immediately shut off the water supply and contact a professional if the leak is severe. Otherwise, try to identify and tighten the leaky connection.
Question: How do I know if my hot water heater is the right size?
Answer: The right size depends on your household’s needs. Consider the number of people in your home and your typical hot water usage. A professional can help you choose the right one.
Question: Can I install a tankless water heater myself?
Answer: While it’s possible, tankless water heaters require specific plumbing and electrical work. You should consult local codes and consider hiring a professional to ensure safe installation.
Final Thoughts
Knowing how to install a hot water heater empowers you with a valuable skill, saving you money on labor costs and giving you a strong sense of accomplishment. This process involves careful planning, gathering the right tools, and following a step-by-step guide. From turning off utilities and draining the old unit to connecting the new one, each stage is important for a successful installation. Remember that safety is key, and if you’re ever uncertain about a step, don’t hesitate to contact a qualified plumber. With patience and attention to detail, you can provide your family with comfortable hot water, which enhances your home. Consider regular maintenance, like flushing the tank annually, to maintain its efficiency.